
Preparation Essentials: How to Get Ready for Your Backyard Shed Installation
Introduction
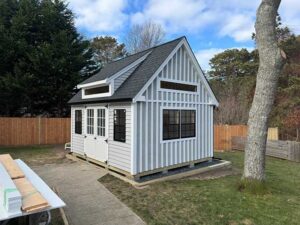
Preparing for a backyard shed setup might initially seem like a daunting task, but a little groundwork can ensure everything goes off without a hitch. Your new shed isn’t just a structure—it’s an enhancement to your outdoor space, waiting to turn into a functional and aesthetic asset in your yard. By following this guide, you’ll master the essentials of Freetown shed setup, ensuring that the day of setup is a breeze. With your custom-built Statewide Shed on the way, let’s dive into the meticulous yet rewarding process of preparing for your backyard shed installation.
It’s completely understandable to feel a pinch of anxiety as installation day approaches. After all, this is a significant addition to your property that could serve myriad purposes—from a neatly organized storage space to a serene nook for hobbies or relaxation. Whether it’s for gardening, tools, or even a cozy hideaway, the right setup can bring immense joy and utility. So, let’s ensure you’re ready for the installation crew, transforming what could be a frustrating day into an enjoyable occasion.
This laid-back guide is designed to set your mind at ease and walk you through each step you need to take for a successful shed installation experience. We’ll cover everything from clearing the area to knowing local regulations and ensuring safe access for the delivery team. So take a deep breath, grab a cup of coffee, and let’s get started on turning your backyard vision into reality!
Clearing the Area
The first step in your Freetown shed setup is deciding where your new shed will be located. Take some time to visualize how it will fit into your existing landscape. Perhaps you want it nestled next to a tree or standing proudly against your fence. Regardless of the placement you choose, it’s essential to clear the area thoroughly. This means removing any leaves, debris, sticks, or overgrown plants that could impede the shed setup.
Along with enhancing the aesthetic appeal of your yard, clearing the area allows the installation team to work efficiently—there shouldn’t be any surprises lurking under that pile of leaves! Be diligent in checking for rocks or any other fixed objects as well; you want to set the scene for a clean and stress-free site preparation environment. Taking this step early helps pave the way for a smoother experience when the day arrives.
Once the area is clear, take a moment to review your plan to confirm everything looks good. If you have any tweaks you’d like to make regarding the location or the shed style, now is the perfect time to address those thoughts. After all, you want this shed to be a perfect fit for your lifestyle and not just another structure cluttering your backyard.
Leveling the Ground
Next up on your checklist is leveling the ground where your shed is destined to sit. A level site is not just about aesthetics—it’s crucial for the structural integrity of your shed. Without a level foundation, you could face issues down the line, such as uneven floors or warping due to improper weight distribution. Grab a shovel or rake to fill in any dips or low spots. If you’re feeling adventurous, laying down some gravel can add extra stability to your shed’s foundation.
If leveling the ground sounds like a daunting task, don’t hesitate to call upon the experts at Statewide Shed for advice. They can guide you on the best practices to ensure your shed stands strong against the unpredictable New England weather. Sometimes, seeking professional help can save you a lot of time and effort, ensuring that your shed foundation is perfect before installation day arrives.
Additionally, ensure that the ground is not only level but also firm enough to support the weight of your shed and any items you plan to store in it. A robust and level foundation lays the groundwork—not only for your new structure but also for your peace of mind as you look forward to utilizing your shed in the years to come.
Establishing a Clear Path
Once your shed spot is cleared and leveled, it’s time to establish a clear path for the installation team. This might seem minor, but an unobstructed pathway can make all the difference in the installation process. Think of it from the perspective of the delivery team: they’ll be maneuvering large pieces of the shed from the delivery truck to your backyard, and any obstacles can complicate matters and slow everything down.
Catalog any potential hindrances, such as garden furniture, planters, or decorative elements in your yard. Make sure to move these items well before installation day, as it’ll save both you and the team time. Don’t forget to check if any low-hanging branches or tight corners could pose a problem for larger shed components; a little foresight can go a long way in ensuring a smooth delivery and setup experience.
In some instances, considering your neighbors’ space is also a good idea—if your installation crew needs to maneuver around, ensuring there’s enough room can help them do their job efficiently. By preparing in this way, you’re setting the stage for a hassle-free installation, allowing the team to focus their attention on assembling your beautiful new shed rather than navigating around obstacles.
Checking Local Regulations
As you prepare for your backyard shed setup, it’s critical to check any local regulations or permits that may be necessary for shed installations in your area. Rules can differ significantly depending on local zoning laws, so it’s always best to inform yourself well ahead of time. Nobody wants to be caught off guard by a last-minute requirement that could delay your project.
Start by consulting your local building department to inquire about any specific restrictions regarding shed size, height, or placement on your property. Some municipalities may even require a building permit, and understanding these regulations in advance can help you navigate the installation process without hiccups.
If you find that you do require a permit, be proactive in gathering the necessary paperwork and making any fees that may be due. By establishing these requirements beforehand, you’re ensuring that nothing stands in the way of welcoming your new shed to its home!
Taking Utility Lines into Account
One key aspect of your site preparation is being aware of any underground utility lines or cables lurking beneath the surface of your yard. It’s essential to locate these lines before any digging occurs, as accidentally disrupting them can lead to costly repairs and significant safety hazards. If you’re uncertain where these lines are positioned, it’s a good idea to reach out to your utility companies for assistance.
Many utility companies provide services to mark these lines, indicating where you can safely dig without risking any disruption. Taking this precaution will not only ensure compliance with safety regulations but also keep the installation process flowing smoothly without unexpected interruptions. Remember, there’s a difference between being proactive and reactive, particularly regarding utilities.
By being vigilant and making this inquiry part of your shed setup planning, you’re setting yourself up for success. A smooth installation process translates to fewer headaches down the line, allowing you to focus on what matters: enjoying your new shed!
Planning for the Unexpected
While meticulous planning is key, it’s also wise to prepare for unexpected circumstances, especially when it comes to weather. New England is notorious for its quick weather shifts, and on the day of your shed installation, you might find yourself facing rain or unfavorable conditions. It’s essential to have a backup plan that ensures both you and the installation crew are comfortable, regardless of what Mother Nature decides to throw your way.
If there’s a chance of rain, consider designating a sheltered area where the installation team can keep their tools dry, take breaks, or even wait out the storm if needed. Keeping tools and components protected not only safeguards your shed materials but also enhances the efficiency of the installation process. Flexibility can relieve potential stress and assist everyone in staying productive.
Moreover, if you find that conditions are truly not conducive to proceeding on installation day, don’t hesitate to consult with the Statewide Shed team. Whether they recommend rescheduling or suggest tweaks in planning, being prepared for the unexpected can make the process smoother and help maintain communication and cooperation between you and the installation crew.
Staying Informed
A big part of Freetown shed setup is keeping the lines of communication open with the Statewide Shed team leading up to your installation day. They’re your best source of information regarding what to expect during installation. If you have any last-minute questions or concerns, don’t hesitate to reach out; it’s important that everyone involved is on the same page.
Being in contact with the team allows you to remain informed about any requirements or changes in schedule. For instance, if certain materials arrive sooner than expected or if additional team members will be present, knowing these details can help you prepare. By fostering a collaborative spirit, you’ll find that the entire installation experience is much more relaxed and enjoyable.
Moreover, having open communication demonstrates your commitment to the project and allows for any possible adjustments to be made for an optimal outcome. A well-informed homeowner can take great comfort in the fact that they have thoroughly prepared for their backyard shed installation. So don’t hesitate to reach out—after all, the installation team is there to assist you every step of the way!
Conclusion
With these preparation essentials under your belt, you’re well on your way to enjoying a seamless and efficient shed installation. From clearing the area to leveling the ground, ensuring easy access, and checking local regulations, each step paves the way for your new addition to become a beloved part of your outdoor space. The anticipation of your stunning, custom-built shed from Statewide Shed is exciting, and the groundwork you lay now will make all the difference.
As you get closer to installation day, remember that the efforts you put into preparing your yard will pay off tenfold in the joy and utility your new shed brings. By laying a strong foundation, you will not only enhance your yard’s aesthetics but also maximize the functionality of your outdoor space for years to come. So kick back, relax, and get ready to enjoy your beautiful new shed—your backyard haven awaits!
For durable, custom-built sheds and excellent service, contact Statewide Shed today for a free consultation.
Looking to add a custom-built shed to your property? Whether it’s for storage, a backyard retreat, or a workshop, we’re here to help! Contact us at 508-558-3636 or email us at info@statewideshed.net for expert advice or to discuss your upcoming project. Let us build a shed that’s designed to last and tailored just for you!